If you are reading this article, I assume you must have used AdonisJs or you must have heard about the framework. AdonisJs is a NodeJs web framework that was inspired by Laravel. The framework was modeled after Laravel.
Like most robust frameworks, AdonisJs comes with a validator module that helps you in validating data (usually user input). However, the default validator does not come with every possible rule, you sometimes have to implement your own. The good news is that it is very easy to write custom rules and add them to the validator. In this article, I will walk you through how to do that.
First, we have to setup our application - let’s call it MCU Character Checker. To start, install adonis globally with:
npm i -g @adonisjs/cli
Create a new application with:
adonis new mcu-character-checker
Check installation page for more information. Here is what our folder structure will look like:
├── app
│   ├── Middleware
│   └── Models
├── config
├── database
│   └── migrations
├── public
├── resources
│   └── views
└── start
Start the application server:
cd mcu-character-checker && adonis serve --dev
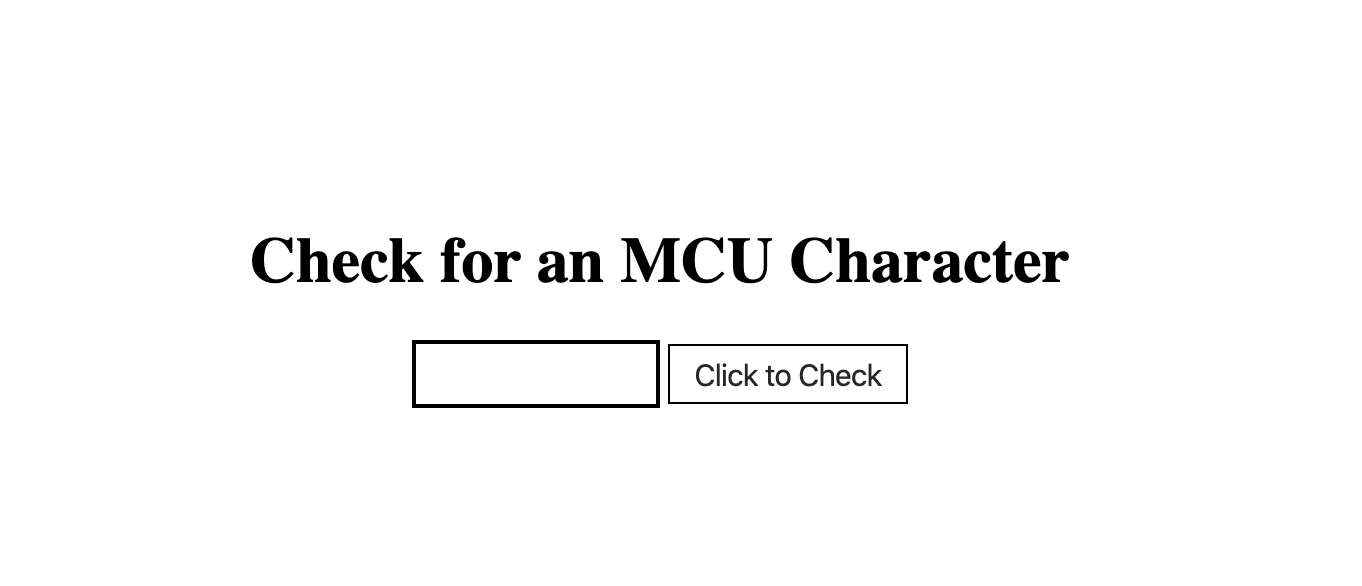
You can open the application on localhost:3333, AdonisJs serves on port 3333 by default. You should have this page in the image below if everything ran correctly.

Now, let’s create a page that collects data. We’ll edit start/routes.js.
Replace the index route with this line:
Route.get("/", "CharacterController.showPage");
We have added our / route, now we have to create our CharacterController to handle this route. We’ll do this by running
adonis make:controller CharacterController --type http
Great! Now we have our CharacterController, let’s create our showPage method to handle the route:
async showPage({ view }) {
  return view.render("check-character");
}
Create the view for the route:
adonis make:view check-character
This will create resources/views/check-character.edge. Add the lines below to the file.
<!DOCTYPE html>
<html lang="en">
<head>
    <!-- Standard Meta -->
    <meta charset="utf-8" />
    <meta http-equiv="X-UA-Compatible" content="IE=edge,chrome=1" />
    <meta name="viewport" content="width=device-width, initial-scale=1.0, maximum-scale=5.0">
    <title>
      Check MCU Characters
    </title>
    <style>
      .container {
        margin:auto
      }
      .form {
        text-align: center;
        margin-top: 20vh;
      }
      .form input, .form button {
        width: 120px;
        height: 30px;
        padding: 0;
        font-size: 15px;
        border-color: black;
      }
    </style>
  </head>
<body>

  <div class="container">
    <div class="form">
      <h1> Check for an MCU Character</h1>
      <form action="" method="POST">
        {{ csrfField() }}
        <input type="text" name="character" required>
        <button type="submit">Click to Check</button>
      </form>
    </div>
  </div>

</body>
</html>
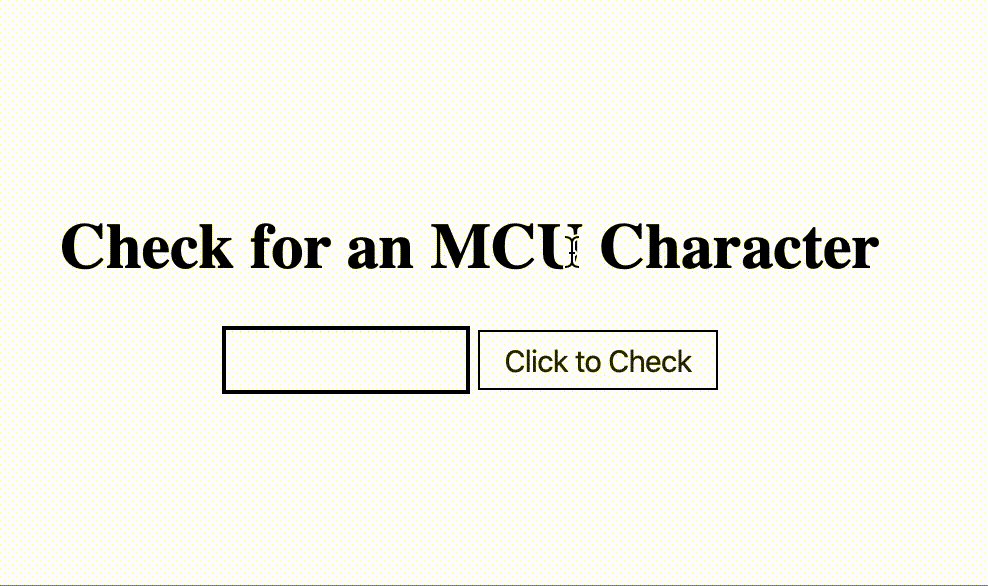
The page should look like this;
Our goal is to validate that a character (provided in the form) exists in the MCU. Obviously, this kind of validation may not be easy to achieve with the rules provided on AdonisJs validator so we will have to create a custom rule.
The rule will check a list of names and validate that the provided name is for an MCU character. To create a custom rule we need to first install Adonis Validator. Run this command to install it:
adonis install @adonisjs/validator
Then, register the validator provider inside the start/app.js file:
const providers = [
  '@adonisjs/validator/providers/ValidatorProvider'
]
To extend the validator, we’ll implement our validation function and add it to start/hooks.js. The file isn’t part of our current setup, so we’ll create it then add these lines to the file:
const { ioc } = require("@adonisjs/fold");
const { hooks } = require("@adonisjs/ignitor");
Adonis provides different hooks for differents points in the application lifecycle. Adonis currently has 5 hooks namely: providersRegistered, providersBooted, preloading, httpServer and aceCommand. For our use case, we’ll use providersRegistered. Next, we implement our validation function and extend the Validator. Our validation function will have the following parameters, data, field, message, args, get.
datais an object containing the input fields and their values. In our case, it will look like this{ character: 'Iron Man' }.
fieldis the particular input field that is being validated which would becharacterin our case.
messageis the error message that should be returned if the validation fails.
argsis a list of extra values passed in the validation rule.
getis a function that is used to get the value of a key in an object (i.e data). To get the value ofcharacter, we’ll useget(data, field).
Our validation function which will be in start/hooks.js will look like this:
const mcuCharacter = async (data, field, message, args, get) => {
  // get the character value
  const value = get(data, field);

  if (!value) {
    /**
     * skip validation if value is not defined. `required` rule
     * should take care of it.
     */
    return;
  }

  // validate the character
  const shortListOfMCUCharacters = [
    "iron man",
    "hulk",
    "spider-man",
    "loki",
    "thor",
    "odin",
    "black widow",
    "nick fury",
    "gamora",
    "black panther",
    "doctor strange",
    "groot",
    "ant-man",
    "captain america",
    "hawkeye",
    "wasp",
    "star-lord",
    "shuri",
    "valkrie",
    "dormammu"
  ];

  // if the character is not in the list, throw the validation error message
  if (!shortListOfMCUCharacters.includes(value.toLowerCase()))
    throw message ||
      `Nah, ${value} isn't part of the list as far as I am concerned`;
};
We’ll extend the Validator with this new validation function.
Validator.extend("mcuCharacter", mcuCharacter);
Note: the
Validator.extend’s first argument is a string, it represents how you would use this rule. It must be in camel case, Ours ismcuCharacterwhich would bemc_characterwhen using it as a rule.
We’ll place this extension in the providersRegistered hook. So our start/hooks.js will look like this:
hooks.after.providersRegistered(() => {
  const Validator = ioc.use("Validator");
  Validator.extend("mcuCharacter", mcuCharacter);
});
Note: the
Validatorin imported inside theprovidersRegisteredhook before it’s in this hook that providers are registered so theValidatorcannot be accessed outside of this.
Now that we have created our custom validation rule mc_character, let’s go ahead and use it.
Ways to use Adonis Validator
- Route Level Validation: This validates the
requestpayload before it proceeds to theController. Check here. - Middleware Level Validation: Here, you perform the validation in a middleware.
- Validation in the Controller: You perform the validation in the controller.
You can use any method you like or the one that suits your code structure. I use Route Level Validation when I’m expecting a high number of input fields, I use Middleware Level Validation whenever I need to access the auth object
and I used Validation in the Controller when it’s one or two validations I want to perform.
In our example, we’ll use Validation in the Controller. Import the Validator in CharacterController:
const { validate } = use('Validator')
We’ll add a new route to receive the character in start/routes.js:
Route.post("/", "CharacterController.checkCharacter");
Create the checkCharacter method in CharacterController to handle the request:
async checkCharacter({ request, view }) {
  return view.render("check-character");
}
Let’s validate the character. Add these lines to the checkCharacter method
// create the rules for validation
const rules = {
  character: "required|mcu_character"
};
const validation = await validate(input, rules);
let message = `${input.character} is part of the MCU, yay!`;

if (validation.fails()) {
  message = `Nah, ${input.character} isn't part of the list as far as I am concerned`;
}

return view.render("check-character", { message });
We’ll modify our check-character.edge template and add the message data. Add this below the submit button:
<p>{{ message }}</p>
Our application is now validating MCU characters!
You can check the full source code here
This article is also published on Dev.to